
Taking brilliant photos is one of the reasons we cannot travel or live without an iPhone. As your photos and recordings collection grows, you need pay some attention on the storage status of your device. To offload your photos from your iPhone for creating backup, here are the ultimate guide showing you how to transfer photos from iPhone to your computer.
Mac Free Solid
The default solution to import photos from iPhone to a Mac computer. Keeps photos on your iPhone / iCloud / Mac synced.

Windows 10 PC In-built
In replace of Windows Photo Viewer, Microsoft Photos can import photos from your iPhone to your Windows PC.

Remote Partially Free
In replace of Windows Photo Viewer, Microsoft Photos can import photos from your iPhone to your Windows PC.

Free Easy Expertise
Comparing with other iPhone Photo Transfer options, SyncBird Free edition covers all your iPhone photo albums.
Original released on April 8, 2015 to OS X Yosemite users, the Photos for Mac is a photo management and editing application. It’s also the default methods to transfer photos from iPhone to your Mac computer. As there is no huge changes in iOS 11, you can still choose it as your prior iPhone Photo Transfer solution.
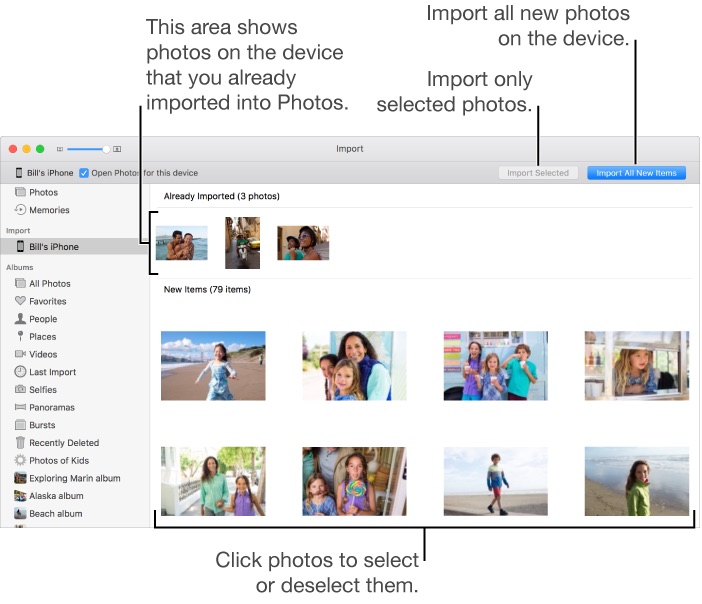
Transfer Photos from iPhone to Computer with Photos
Although mainly made for image viewer, photo editor and photo sharing on Windows 10 and Windows 8, Microsoft Photos app also serves well in importing photos from your iPhone to your computer. Many Windows users are used to offload their photos on iPhone with AutoPlay or File Explorer, but on modern Windows 10 / 8 computer, Microsoft Photos is a better choice as it offers much more options.

Transfer Photos from iPhone to Computer with Microsoft Photos
iCloud Photo Library is a feature on iOS 11 and OS X Yosemite, which stores all of photos taking by your iPhone. Using iCloud Photo Library to transfer photos from iPhone to your Mac is quite easy. With extra download - iCloud for Windows, you can also download all of your iPhone photos and videos from iCloud to your computer.
Be careful that the photos and videos that you keep in iCloud Photo Library use your iCloud storage and your device storage. When you sign up for iCloud, you only get 5GB of free storage. If you use all of your iCloud storage, you need buy more storage, which starts at least $0.99 (USD) a month.
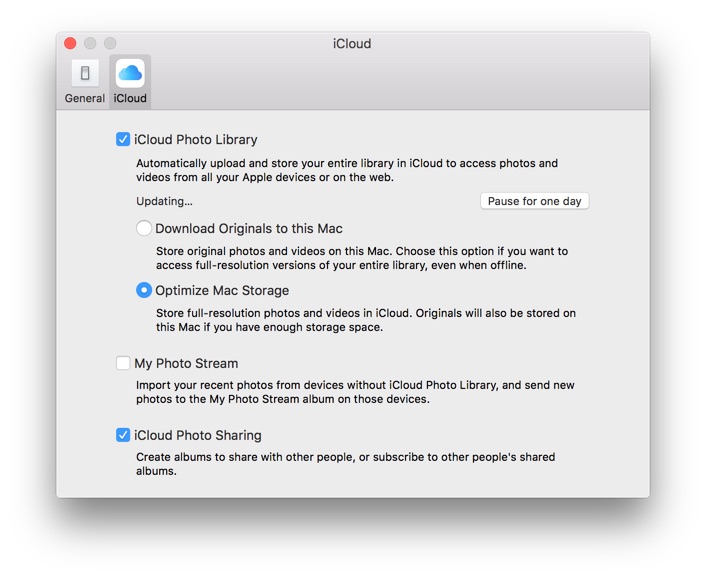
Transfer Photos from iPhone to Mac with iCloud Photos
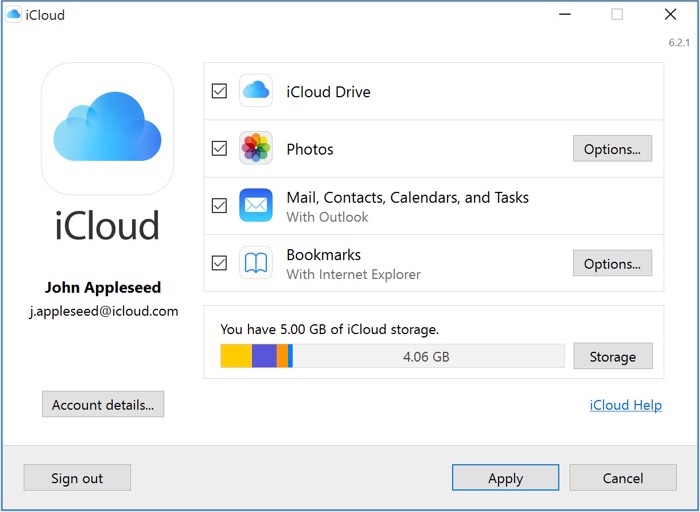
Transfer Photos from iPhone to Windows with iCloud Photos
SyncBird Free is a newly released iPhone Photo Transfer software that's made to import your photos from iPhone to your computer. Unlike other solutions, it covers all photos albums on your iPhone, no matter they are taken directly by the device or synced from iTunes. If the reason to transfer photos from iPhone to your computer is about rescuing your lost photo library, then SyncBird Free is the way to go.
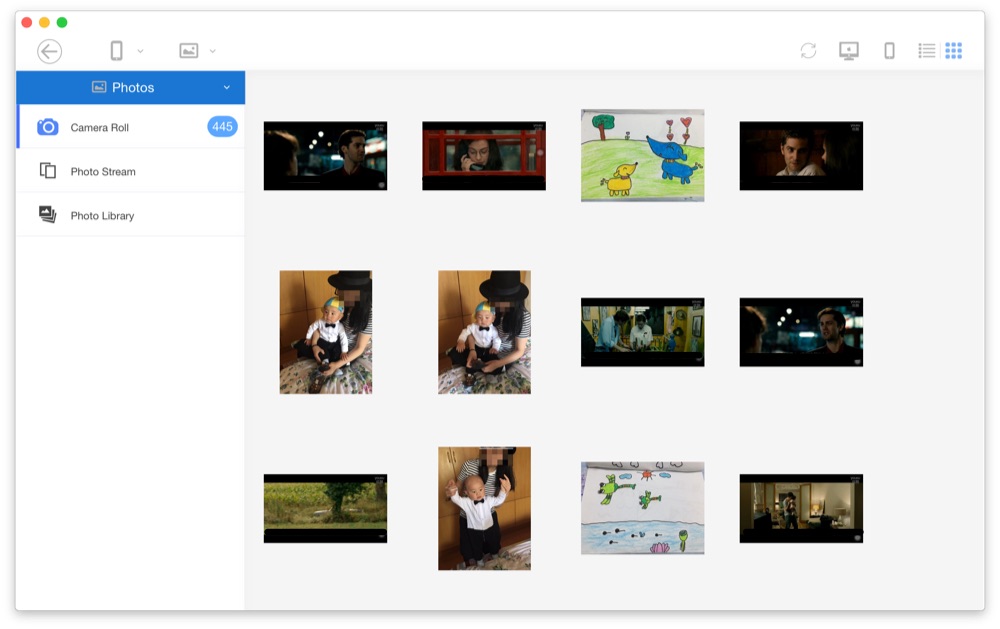
Transfer Photos from iPhone to Computer with SyncBird Free
The methods of transferring photos from iPhone to your computer is much more than we can list, Dropbox, Google Photos, Air Drop, third party desktop and mobile apps. What we suggested is to choose the method that suits your needs at best. As the new iOS 11 is coming next month, we hope our suggestions above may help.
We are building MiniCreo program to deliver modern, smart and free software. We want YOU
to be our Early users, Beta testers and Lifetime privilege members!